Upgrading from the ECS Deploy Runner
This document is deprecated. It outlines the upgrade path from the ECS Deploy Runner to infrastructure-pipelines, which has since been deprecated in favor of Gruntwork Pipelines. If you want to upgrade directly from ECS Deploy Runner to the latest Gruntwork Pipelines, contact us at support@gruntwork.io.
This migration guide is intended for users of the ECS Deploy Runner (EDR) who wish to upgrade to the latest version of Gruntwork Pipelines. For this guide, the latest version of Gruntwork Pipelines is referred to as "Pipelines."
The upgrade process starts by deploying Pipelines through the ECS Deploy Runner and then using Pipelines to phase out the ECS Deploy Runner.
What's new
ECS Deploy Runner provided a secure approach to CI/CD for infrastructure. Pipelines builds on these principles, integrating with modern CI systems like GitHub Actions for improved usability and setup simplicity. Key improvements include:
- Simplified Setup: Pipelines removes the need for deploying AWS resources (aside from setting up an OIDC token), relying solely on GitHub Actions workflows for setup.
- Pull Request-Centric UX: Pipelines organizes its operations around pull requests, offering detailed feedback in pull request comments.
- Streamlined Updates: Pipelines is designed for seamless updates, ensuring users can easily stay on the latest version.
Prerequisites
Before starting, ensure you have the following:
- Permissions to create repositories in your GitHub Organization
- Ability to add users to your GitHub Organization and Gruntwork Developer Portal
- Permissions to create secrets in GitHub repositories
- Terragrunt installed locally
Create Your infrastructure-pipelines repository
Pipelines employs a dual-repository approach, separating code (IaC) from deployment workflows. A dedicated repository, typically named infrastructure-pipelines, is used for deployment workflows and AWS account access, with strict access control. This repository leverages OpenID Connect (OIDC) for generating temporary session credentials, eliminating long-lived secrets.
Name this repository infrastructure-pipelines to align with the default configuration and avoid additional setup adjustments.
Initialize infrastructure-pipelines repository
Create a new Pipelines repository using the provided template:
Steps:
- Click Use this template.
- Click Create a new repository.
- Select your preferred organization as the owner.
- Name the repository (e.g.,
infrastructure-pipelines) and note the name. - Select Private as the visibility.
- Click Create Repository.
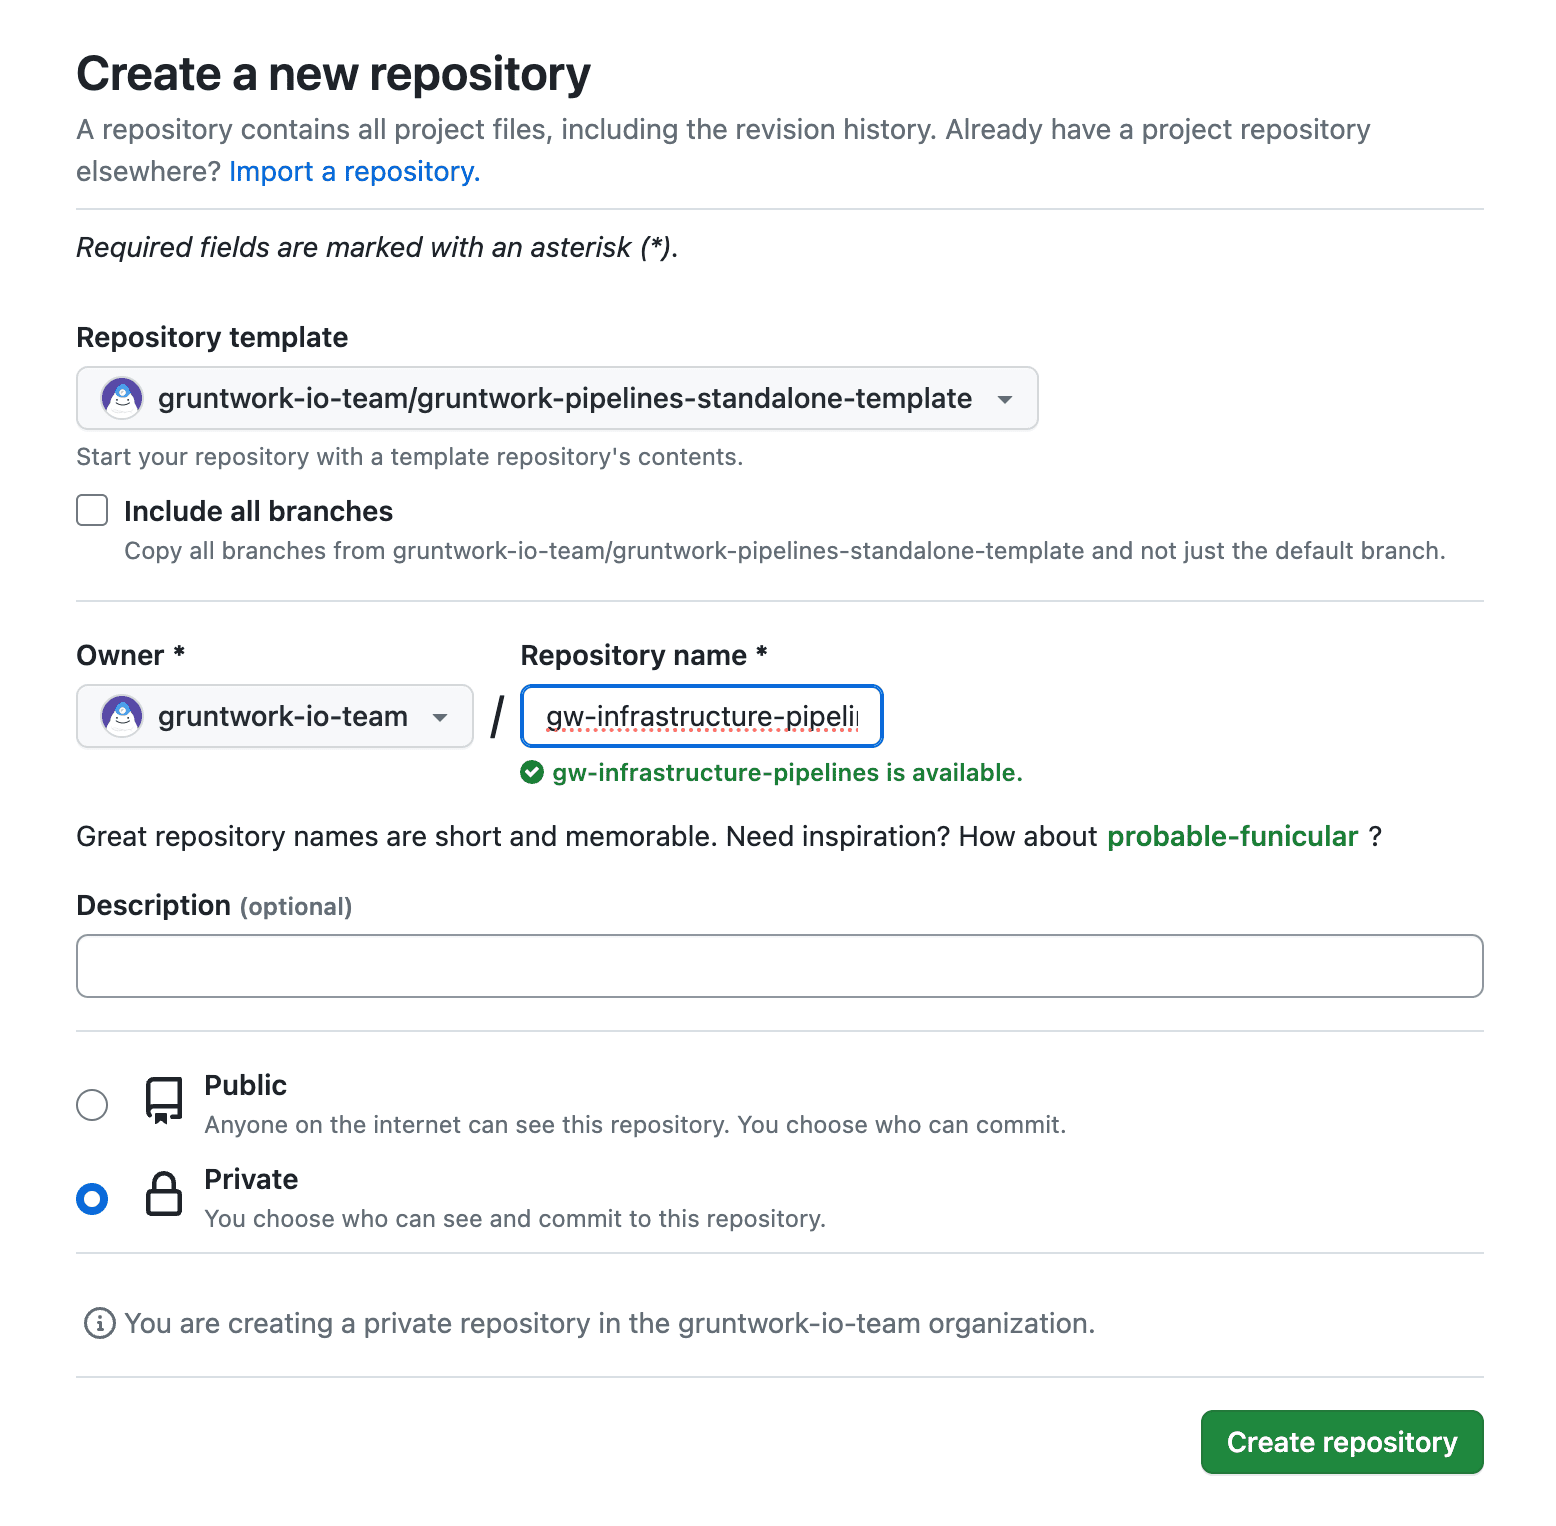 GitHub form for creating a new repository
For production use, configure a branch protection rule for the main branch. At a minimum, enable Require a pull request before merging and require at least one reviewer.
Create temporary bootstrap token
Generate a classic Personal Access Token (PAT) with repo and workflow access using your GitHub account. Store this token as a secret named CUSTOMER_BOOTSTRAP_ACCESS_TOKEN in the infrastructure-pipelines repository.
Bootstrap the Pipelines repository
Navigate to Actions in the newly created repository and run the Infrastructure Pipelines Bootstrap workflow. Provide the name of your infrastructure-live repository as input. This will create a pull request that you can merge.
Delete temporary bootstrap token
Once the repository is successfully bootstrapped, delete the CUSTOMER_BOOTSTRAP_ACCESS_TOKEN secret.
Set up GitHub CI machine Users and secrets
Pipelines uses two machine users: one for read-only operations and another for elevated privileges. Follow the Machine Users Guide to set up these accounts and configure their access tokens in the appropriate repositories.
Create AWS IAM roles for Pipelines
Each AWS account requires an IAM role for Pipelines. These roles mirror those used by ECS Deploy Runner but with updated trust policies to enable OIDC-based authentication. This approach leverages short-lived tokens generated by GitHub Actions workflows instead of long-lived credentials.
For additional context, see Security Hardening with OpenID Connect and OpenID Connect in AWS.
Generate Pipelines IAM code using GitHub Actions
In your infrastructure-live repository, create a pull request to add a GitHub Actions workflow into your .github/workflows directory for bootstrapping IAM roles. Once merged into main, run the Infrastructure Live Bootstrap workflow for each account. Each run generates a pull request containing Terraform code to create the required IAM roles and OIDC providers.
Start by testing Pipelines in non-production environments before rolling it out to production.
Review the plan output generated by ECS Deploy Runner for creating these resources. Once satisfied, merge the pull request to apply the changes.
Update your accounts file
The accounts.json file has been replaced by accounts.yml for improved readability and compatibility with Terraform's YAML formatter. To migrate:
Convert accounts.json to accounts.yml
Use the yq CLI to convert your accounts.json file to accounts.yml using the yq CLI tool and the following command.
cat accounts.json | yq -P > accounts.yml
Confirm that the data in your accounts.json matches the newly generated accounts.yml. If you are upgrading all deployments simultaneously, you can safely delete the accounts.json file. However, if you plan to use both ECS Deploy Runner and Pipelines concurrently during the transition, do not delete accounts.json.
Add new workflows in your infrastructure-live repository
Pipelines, like ECS Deploy Runner, uses GitHub Actions as its execution layer for infrastructure changes. The key difference is that Pipelines employs a more streamlined workflow, utilizing a lightweight set of steps orchestrated by the Pipelines binary. To facilitate the upgrade, we provide a template to generate the necessary workflows with minimal input parameters. Both workflows utilize a file named pipelines.yml, so generating the new workflow will overwrite the existing one.
If you plan to operate ECS Deploy Runner and Pipelines simultaneously during migration, rename your existing pipelines.yml file to avoid overwriting it before generating the new pipelines.yml for Pipelines.
Additionally, you will need to configure path-based filters to exclude migrated directories from the ECS Deploy Runner workflow while including them in the Pipelines workflow. For instance, if you migrate the development account to Pipelines, add development/ to paths-ignore in the ECS Deploy Runner workflow YAML. Simultaneously, include development/ in paths within the Pipelines workflow YAML.
Refer to GitHub documentation on including and excluding paths for further details.
To generate the new pipelines.yml workflow file, execute the following command, replacing the values in <> with appropriate values for your organization -
boilerplate --template-url "git@github.com:gruntwork-io/terraform-aws-architecture-catalog.git//templates/infra-live-github-base" \
    --output-folder ./infrastructure-live/.github \
    --var InfraPipelinesRepoName="<your infra pipelines repo name>" \
    --var GithubOrg="<your GitHub org name>" \
    --var AwsAccountName="<your AWS Account Name>"  \
    --non-interactive
Next, create a branch, commit your changes, and push the branch to the remote repository. Afterward, create a pull request targeting your default branch (e.g., main). Obtain the necessary approvals before proceeding.
Remove old ECS Deploy Runner infrastructure
Once Pipelines is successfully operating within your accounts, the infrastructure used by the ECS Deploy Runner can be safely dismantled. Begin by submitting a pull request (PR) for each directory containing the ECS Deploy Runner configuration. Following this, submit a final PR to remove any remaining ECS Deploy Runner configurations from the _envcommon directory.
Delete code for old Pipelines
For every environment where the ECS Deploy Runner was deployed, locate and delete the ecs-deploy-runner directory. This directory is typically found in the file path <account name>/<region name>/mgmt.
It is advisable to migrate non-production accounts to Pipelines first. After gaining familiarity with Pipelines and ensuring smooth operation over a few weeks, proceed with migrating production accounts. This staggered approach minimizes disruption to your workflows and day-to-day operations.
Create a branch, commit your changes, and push the branch to the remote repository. Then, create a pull request targeting your default branch (e.g., main). Pipelines will detect the changes and execute a plan -destroy to preview the removal of the ECS Deploy Runner infrastructure. Gather any required approvals and merge the PR. Upon merging, Pipelines will automatically run a destroy action to remove all infrastructure associated with the ECS Deploy Runner.
Wrapping up
Congratulations! By completing this guide, you should now be deploying infrastructure to at least one AWS account using Pipelines. If you have any feedback or suggestions, please reach out to feedback@gruntwork.io.