Using the Gruntwork AWS Account Factory Workflow
Generate the account-request file
There are currently two ways to generate the account-request file:
- Using the Gruntwork Developer Portal (GitLab and GitHub non-enterprise customers)
- Using the Gruntwork AWS Account Factory workflow in your repository (GitHub only)
- Using Portal UI
- Using Workflow in Repo
Using the Gruntwork Developer Portal
-
Navigate to the Account Request page in the Gruntwork Developer Portal, as an authenticated user, to access the request generator UI.
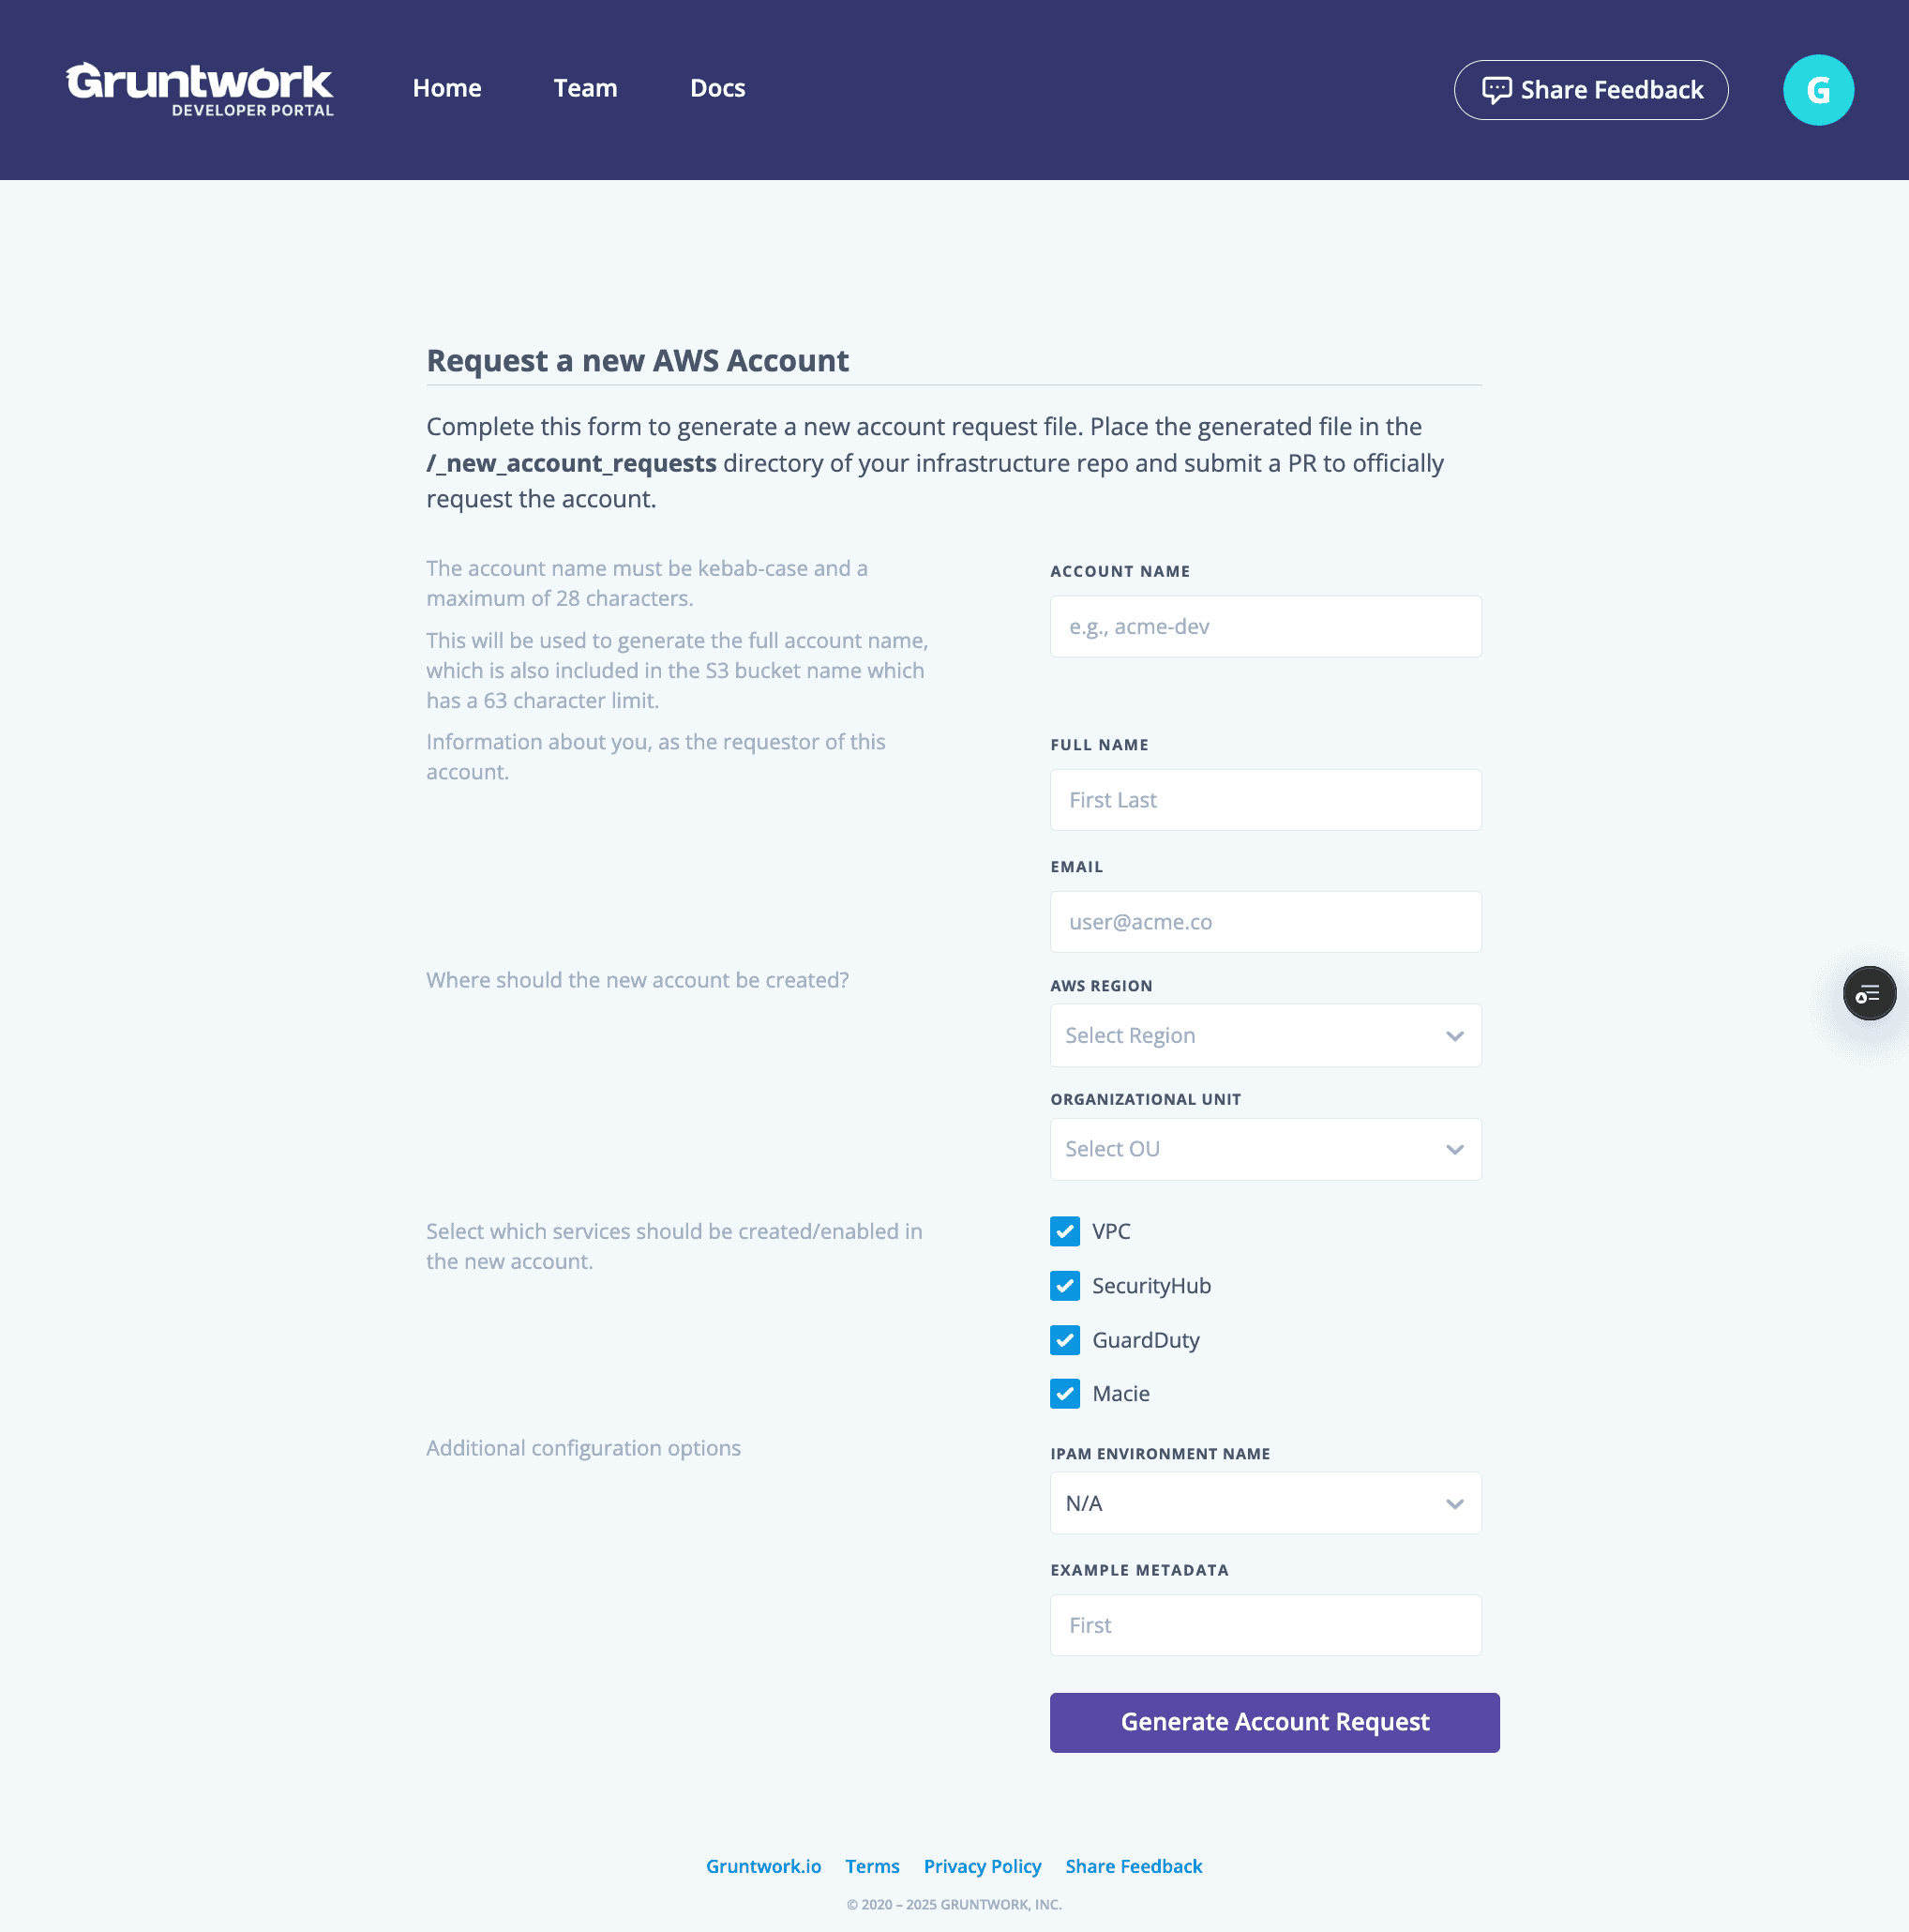 Account Request Generator
 -
If the form is disabled for filling out, request that an Admin in your Gruntwork Developer Account configures the Gruntwork AWS Account Factory settings.
-
Fill out the form with the required information and click on the "Generate Account Request" button.
-
Use the "Download" button to download the account-request file or the "Copy" button to copy the account-request file to your clipboard.
-
Navigate to your repository and create a new branch.
-
Create a new file in the
_new-account-requestsdirectory by moving the downloaded file to the directory or by creating a new file with the content of your clipboard. If copying content, ensure that the file is created with the correct name displayed in the generator output. -
Commit your changes and open a Pull Request to the main branch.
Using the Gruntwork AWS Account Factory workflow in your repository
Only available for GitHub customers. This guide focuses on non-delegated repositories. Enterprise GitHub customers can also use Gruntwork AWS Account Factory to create new Delegated Repositories.
The Account Factory Workflow in your infrastructure-live-root repository can be used to create new AWS accounts. It requires a single input—a JSON payload—generated from the account-factory-inputs.html web page.
The JSON payload approach provides greater flexibility for account vending, overcoming the GitHub workflow restriction of a 10-input maximum.
Step 1 - Download the file
This guide focuses on non-delegated repositories. Enterprise customers can also use Gruntwork AWS Account Factory to create new Delegated Repositories.
Locate the inputs web page in your infrastructure-live-root repository at .github/workflows/account-factory-inputs.html and download it to your local machine.
Step 2 - Populate the values
Open the downloaded account-factory-inputs.html file in a web browser and populate the input fields as required.
Once all values are filled, click "Generate" and copy the resulting JSON output to your clipboard.
Step 3 - Run the Gruntwork AWS Account Factory workflow
Access the Actions tab in your infrastructure-live-root repository on GitHub and select Account factory from the left-hand pane.
Click "Run workflow" on the right, paste the generated JSON payload into the dropdown, and click the green "Run workflow" button to initiate the workflow.
After the workflow is complete, a new Pull Request will be created in the infrastructure-live-root repository. This PR will add an account request to the _new-account-requests directory.
Review and merge the account request PR
Review and merge the Pull Request to begin the account creation process.
Once the account request PR merges into the main branch, Pipelines will initiate the account creation in AWS. This process typically takes 10 to 15 minutes but may extend to 45 minutes.
-
The SSO user created for the new account will use your organization's Access Portal URL to log in. New users invited to AWS IAM Identity Center (formerly AWS SSO) will receive an email with login instructions. Existing users can access the Portal URL through the organization's administrator.
-
The root user of the new account will receive an email and can log in by following the "Forgot Password" process on the AWS Console's Sign-in page.
When the account is successfully created, Pipelines will open another Pull Request to baseline the account.
Review and merge the Account Baseline PR
Review and merge the Account Baseline Pull Request. This PR contains essential infrastructure for enabling your delegated repository to plan and apply infrastructure changes in AWS. It also includes account baselines and configured account-specific infrastructure, such as a VPC.
The new account's Infrastructure as Code (IaC) is tracked in infrastructure-live-root as a newly created directory. Once the Account Baseline PR merges into the main branch and Pipelines applies the changes, you can add infrastructure to the new account by creating Terragrunt units in the directory.