Hello world
In this tutorial, we’ll walk you through the process of setting up Gruntwork Pipelines for a single AWS account. This is useful both as a "hello world" for Gruntwork Pipelines and as the first step to getting it ready for production.
What you'll get
By the end, you’ll have:
- An automated pipeline for deploying infrastructure changes into an AWS account
- Two GitHub repositories
infrastructure-live— Defines the infrastructure that is deployed to your AWS accountinfrastructure-pipelines— Contains deployment definitions for your infrastructure
- A group of IAM roles in your AWS account that allow GitHub Actions modify your account through OIDC
- An S3 Bucket deployed automatically by Gruntwork Pipelines
Prerequisites
Before you begin, make sure you have:
Permissions to create and administer repositories in GitHub
A sandbox or development AWS account
Valid AWS credentials for a user with AdministratorAccess to the AWS account mentioned above. Use version 2 of the AWS CLI if that's your preferred method of authentication.
Terragrunt installed on your system
A GitHub user with an active Gruntwork Subscription for creating a classic GitHub PAT with
repo&workflowscopes as well as access to Gruntwork packagesinfoTo create a classic GitHub PAT:
- Navigate to https://github.com/settings/tokens
- Choose
Generate new token (classic). - In the "Note" field, enter "Gruntwork Pipelines POC" (or something similar), select the
repoandworkflowscope checkboxes, then clickGenerate token.
Keep your token handy; we'll be using it shortly.
Setting up the repositories
In this section, you’ll set up two git repositories:
- The
infrastructure-liverepository will contain the definitions of your infrastructure as code (IaC) - The
infrastructure-pipelinesrepository will define how your IaC will be deployed.
Then, you’ll create a GitHub Personal Access Token (PAT) that allows:
- GitHub Actions (GHA) workflows defined in
infrastructure-liveto run GHA workflows defined ininfrastructure-pipelines - GHA workflows defined in
infrastructure-pipelinesto clone theinfrastructure-liverepository
Finally, you’ll set up your PAT as a GitHub Actions secret in each repository.
Create the repositories
Create a new repository from the templates provided below:
In this tutorial, we will use the default GitHub repo configuration.
In a production environment, we recommend setting up
branch protection rules
for your main branch as described in Branch Protection.
For each of the template repositories above:
- Click
Use this template - Click
Create a new repository - Select your preferred organization from the owner dropdown
- Name the repo anything you like and make note of the name.
- Select the
Privateradio button - Click
Create Repository - Repeat for the second template repository
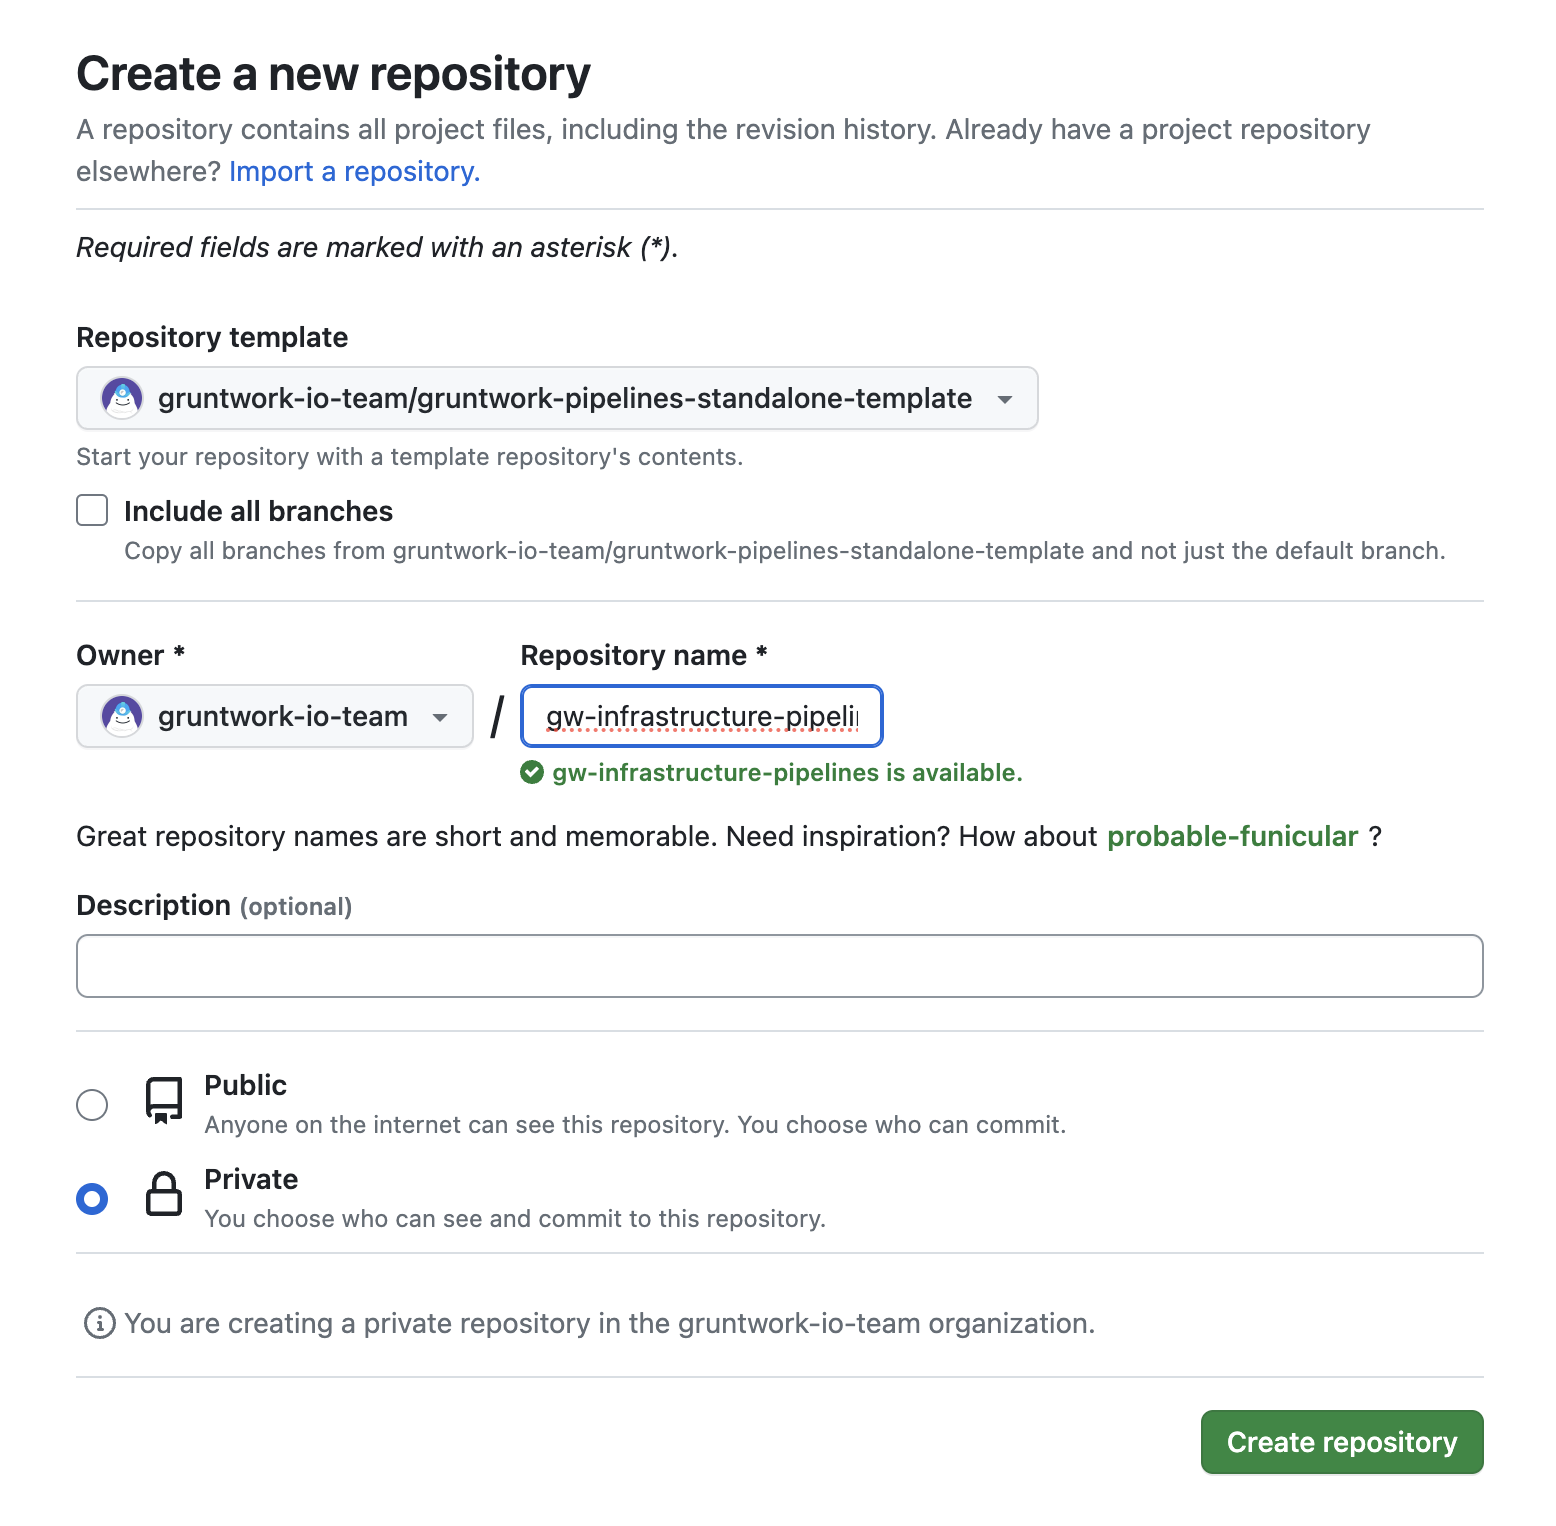 GitHub form for creating a new repository
Setting up secrets
In this section, you're going to configure GitHub Actions secrets for each repository. Our goal here is to enable:
infrastructure-liveto kick off GitHub Actions workflows in theinfrastructure-pipelinerepositoryinfrastructure-pipelinesto clone theinfrastructure-liverepositoryinfrastructure-pipelinesto access Gruntwork modules
In this tutorial, we will use a single GitHub Personal Access Token (PAT) with broad access in secrets.
In a production environment, we recommend using a mix of fine-grained and classic PATs as described in Machine Users.
The required secrets can be created using either the GitHub CLI or manually in the GitHub UI.
GitHub CLI
Copy the script below and edit the exports at the top to match your git repo names and GitHub PAT, then run it while authenticated using the GitHub CLI
export GHA_TOKEN=<YOUR_GITHUB_PAT> # This is the GitHub PAT you created in the prerequisites section
export INFRA_LIVE_REPO_NAME=<YOUR_REPO_HERE>
export INFRA_PIPELINES_REPO_NAME=<YOUR_REPO_HERE>

# infrastructure-live secrets
gh secret set INFRA_LIVE_ACCESS_TOKEN -a actions --repo $INFRA_LIVE_REPO_NAME -b $GHA_TOKEN;
gh secret set GRUNTWORK_CODE_ACCESS_TOKEN -a actions --repo $INFRA_LIVE_REPO_NAME -b $GHA_TOKEN;
gh secret set PIPELINES_DISPATCH_TOKEN -a actions --repo $INFRA_LIVE_REPO_NAME -b $GHA_TOKEN;

# infrastructure-pipelines secrets
gh secret set INFRA_LIVE_ACCESS_TOKEN -a actions --repo $INFRA_PIPELINES_REPO_NAME -b $GHA_TOKEN;
gh secret set GRUNTWORK_CODE_ACCESS_TOKEN -a actions --repo $INFRA_PIPELINES_REPO_NAME -b $GHA_TOKEN;
gh secret set PIPELINES_BOOTSTRAP_TOKEN -a actions --repo $INFRA_PIPELINES_REPO_NAME -b $GHA_TOKEN;
GitHub UI
First, navigate to the infrastructure-live repository. Select the Settings tab, select the Secrets and variables drop down on the left side panel, then select Actions. Create the following secrets and use your GitHub PAT(created earlier in the the prerequisites section) as the value for all of them:
INFRA_LIVE_ACCESS_TOKENGRUNTWORK_CODE_ACCESS_TOKENPIPELINES_DISPATCH_TOKEN
Next, navigate to the infrastructure-pipelines repository. Select the Settings tab, select the Secrets and variables drop down on the left side panel, then select Actions. Create the following secrets and use your GitHub PAT(created earlier in the the prerequisites section) as the value for all of them:
INFRA_LIVE_ACCESS_TOKENGRUNTWORK_CODE_ACCESS_TOKENPIPELINES_BOOTSTRAP_TOKEN
Generating code
In this section, you’ll generate the IaC and GitHub Actions workflow code required to run Gruntwork Pipelines using the bootstrap.yml workflow
included in your repository when it was generated with the Gruntwork template repository.
Infrastructure-pipelines
- Navigate to
Actions - Click
Infrastructure Pipelines Bootstrapin the sidebar on the left - Select the
Run Workflowdropdown and enter the name of yourinfrastructure-liverepository.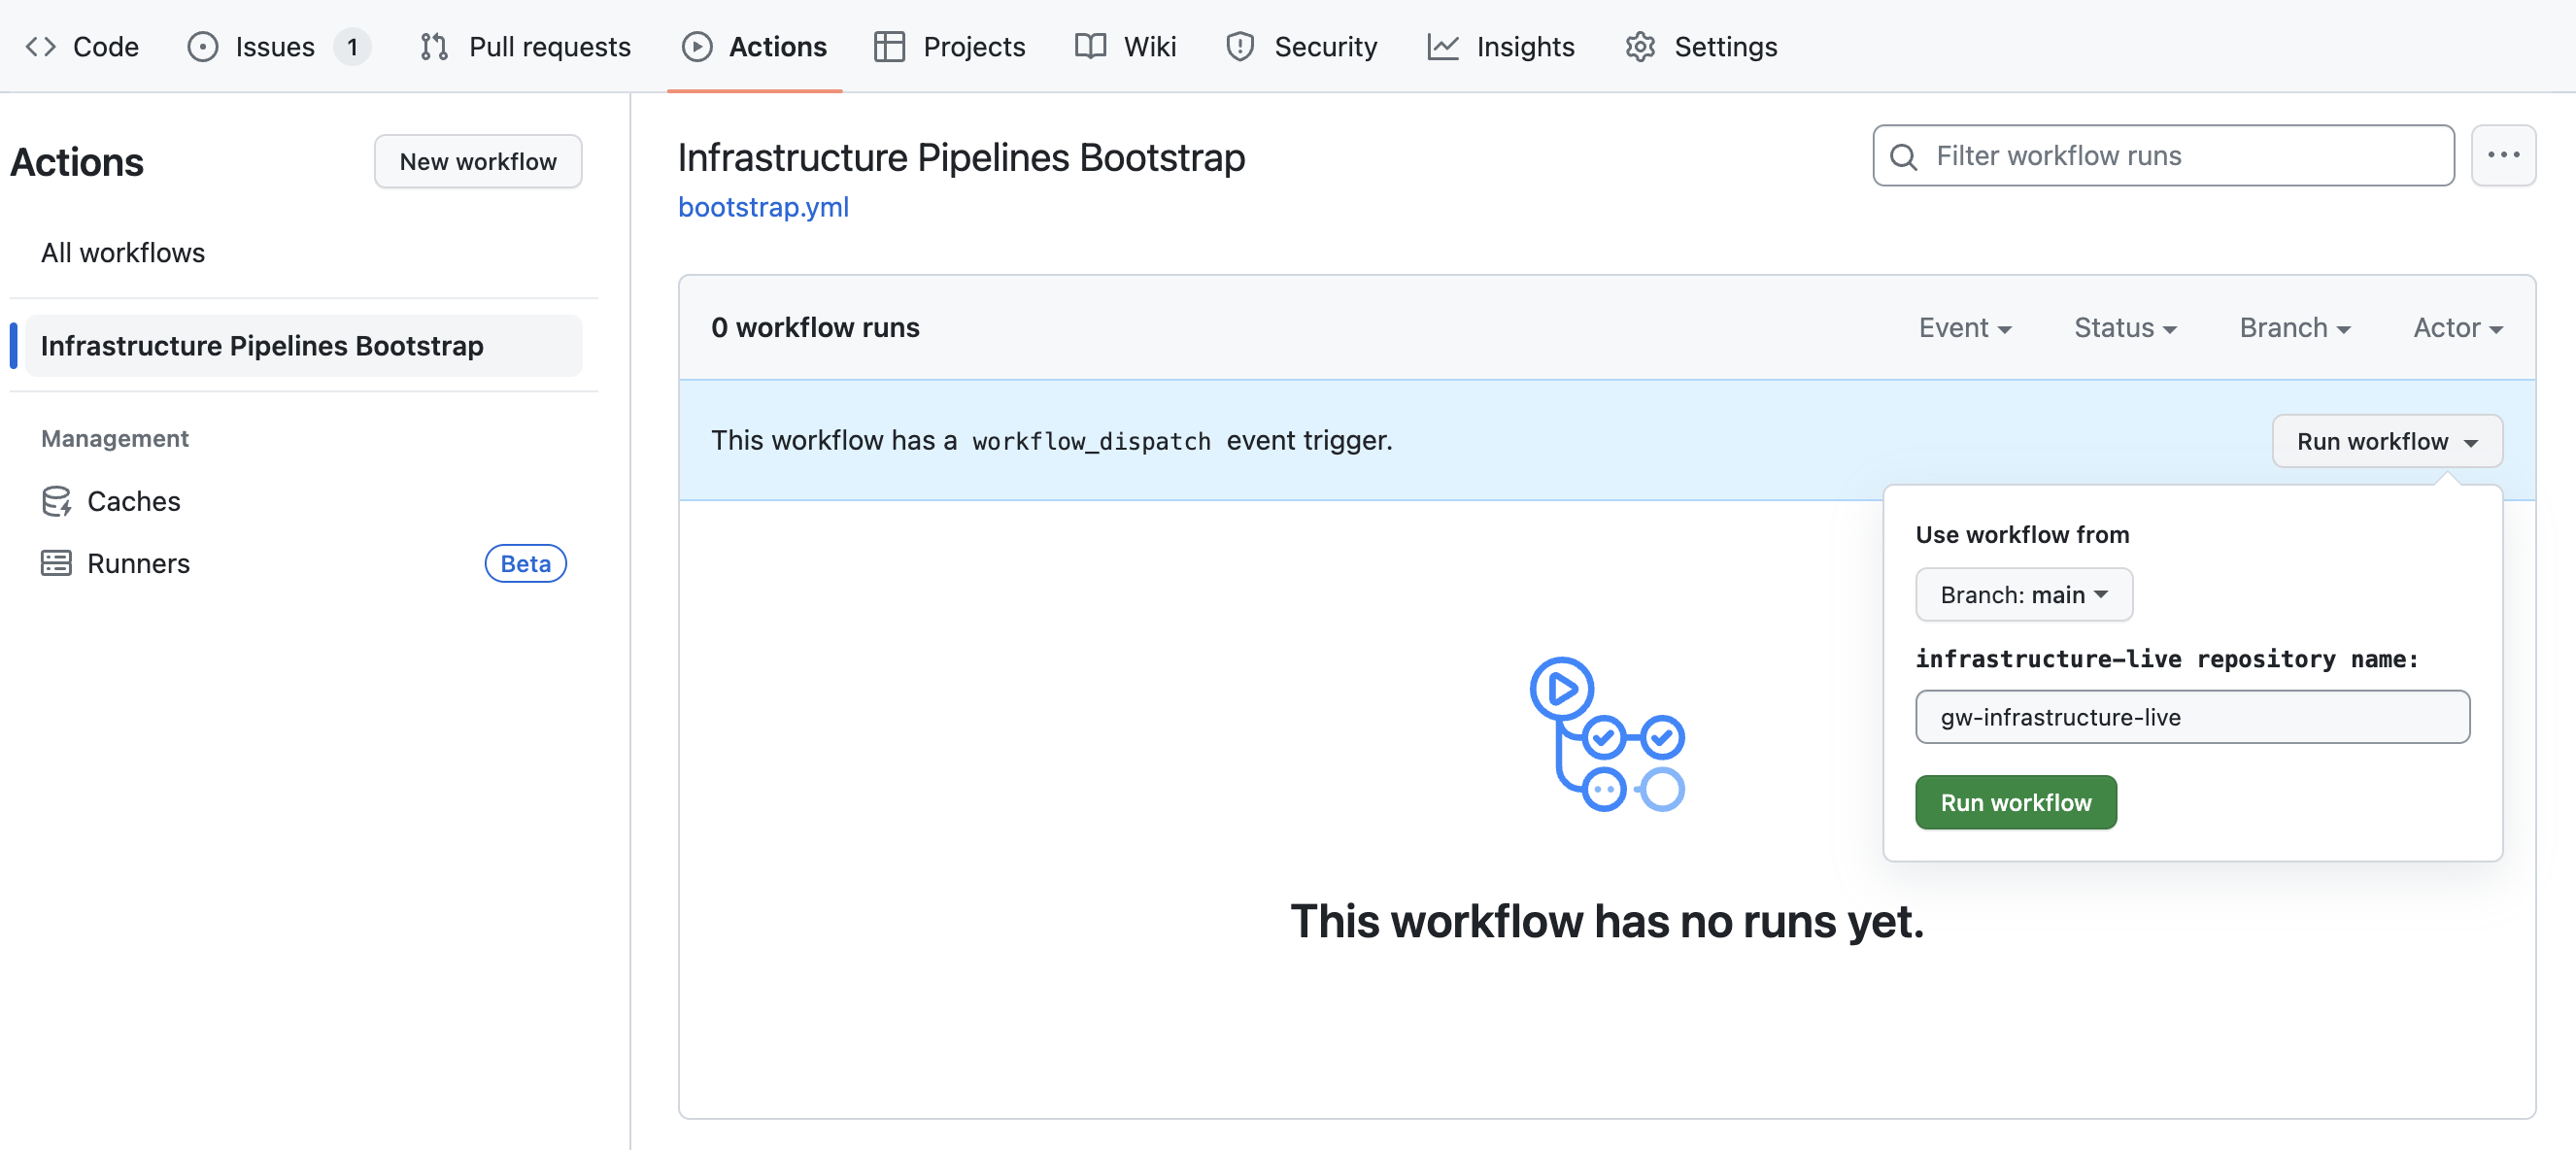
- Click
Run Workflowto start the workflow. - A pull request(PR) will be created after the workflow completes.
- Review the changes, follow the instructions in the PR and then merge.
Infrastructure-live
- Navigate to
Actions - Click
Infrastructure Live Bootstrapin the sidebar on the left - Select the
Run Workflowdropdown and enter the requested details.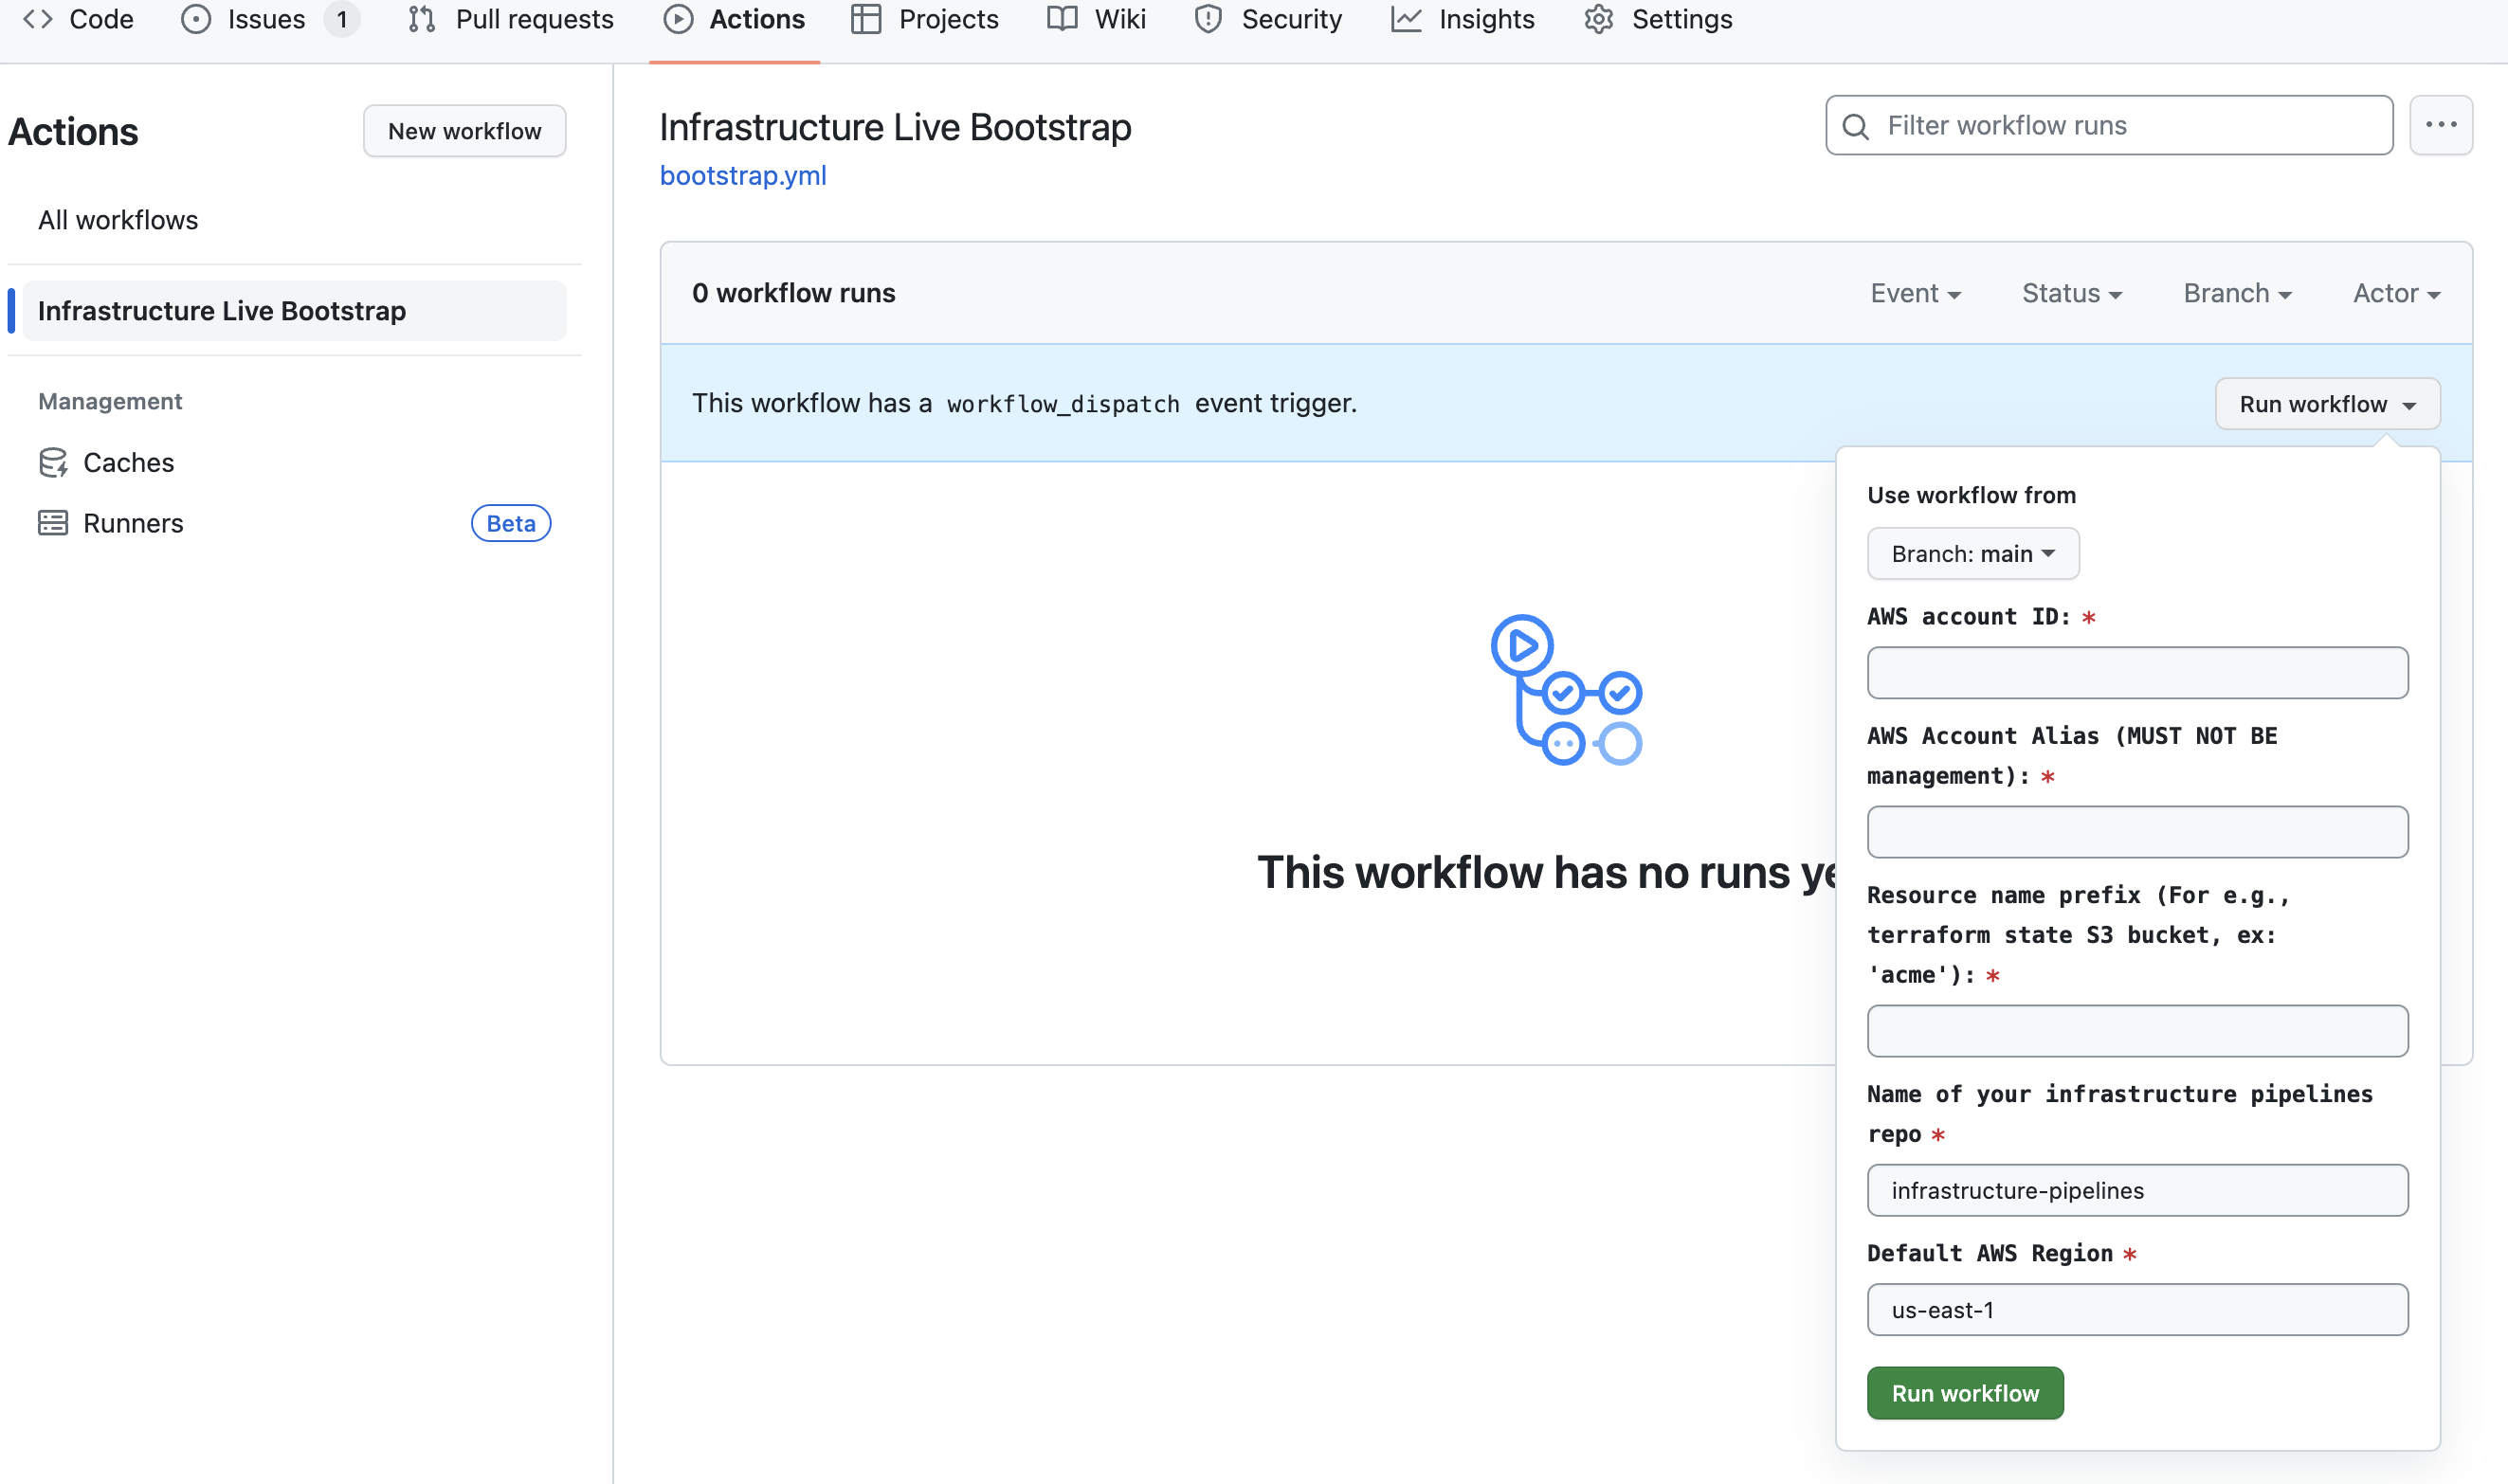
- Click
Run Workflowto start the workflow. - A pull request(PR) will be created after the workflow completes.
- Review the changes, follow the instructions in the PR and then merge.
Running your first pipeline
In this section, you’ll create a resource in your AWS account using Pipelines and GitOps workflows by defining a terragrunt.hcl file that creates an AWS S3 bucket in your AWS account, pushing your changes and creating a pull request (PR) to run a plan action, then run an apply action to create the bucket by merging your PR.
Adding a new S3 bucket
First, create the folder structure that will contain the new S3 bucket in your environment. Replace <account name> with the value you used for AwsAccountName when generating your infrastructure-live code in the infrastructure live section.
mkdir -p <account name>/<region>/<account name>/data-storage/s3
touch <account name>/<region>/region.hcl
touch <account name>/<region>/<account name>/data-storage/s3/terragrunt.hcl
Add the following content to the region.hcl file created above, replacing <your region> with the region you would like to deploy infrastructure in.
locals {
  aws_region = "<your region>"
}
Next, add the terragrunt code to create an S3 bucket. Copy the terragrunt code below, replacing <your S3 bucket name> with your desired bucket name. You may name the bucket whatever you like, just make sure it’s unique.
# ------------------------------------------------------------------------------------------------------
# DEPLOY GRUNTWORK’s S3-BUCKET MODULE
# ------------------------------------------------------------------------------------------------------

terraform {
  source = "git::git@github.com:gruntwork-io/terraform-aws-service-catalog.git//modules/data-stores/s3-bucket?ref=v0.104.15"
}

include "root" {
  path = find_in_parent_folders()
}

inputs = {
  primary_bucket = "<your S3 bucket name>"
}
Planning and Applying
Create a new branch for your changes, commit your changes to your branch, then push your branch. Next, create a PR to merge your branch into main (the default branch in your repository). Follow this GitHub tutorial to create a pull request using your preferred tool of choice.
After you create the PR, GitHub Actions (GHA) will automatically run the GHA workflow defined in infrastructure-live in /.github/workflows/pipelines.yml. Once complete, Pipelines will add a comment to the PR with a link to the GHA workflow logs, click the link see the output of the terragrunt plan action that ran as a result of your changes.
If the plan output looks as expected, you are ready to merge your PR and create the S3 bucket. Click the Merge pull request button to merge the pull request. On merge, Pipelines will automatically run an apply action to provision the S3 bucket. You can find the GHA workflow run associated with the merged PR by navigating to the main branch on your PR and clicking on the Check Run icon at the top of the file explorer, then clicking details next to the Pipelines workflow. This will take you to the dispatch job for Pipelines, which contains a link to the workflow run in infrastructure-pipelines where you can see the output of your Pipelines run.
Congratulations! You've just used Gruntwork Pipelines and a GitOps workflow to provision resources in AWS.
Common errors
Error: Parameter token or opts.auth is required
This means that one of the secrets you needed to specify above was not configured correctly.
Next steps
Add/update/destroy more resources
At this point, you can continue using Pipelines on your own by adding, updating, and deleting terragrunt.hcl files to or from your environment. Alternatively, create a _module_defaults directory as a way to set default module vaules picked up by multiple terragrunt.hcl files, define a module there, then use it in your environment to see how Pipelines handles these types of changes.
Adding more AWS accounts
You also can extend your usage across many AWS accounts by re-running the infrastructure-live boilerplate template to create the folder structure for additional accounts (you will need to manually update your accounts.yml file with this approach).
Adding more git repositories
You can extend the Pipelines model so that a single infrastructure-pipelines repository can serve more than one infrastructure-live repository. This is useful if a central DevOps team or platform team wants to maintain control over the Pipeline, while allowing individual app teams to "hook in" to the Pipeline.
Cleanup (optional)
If you are not going to continue using Pipelines after this tutorial, clean up the resources you created by running terragrunt run-all destroy from your account based folder. You may also delete the two repositories created in Setting up the repositories.