Upgrading from the ECS Deploy Runner
This migration guide is intended for those running the previous version of Gruntwork Pipelines, known as "ECS Deploy Runner" (EDR), who want to upgrade to the latest version of Gruntwork Pipelines. We will refer to the latest version of Gruntwork Pipelines simply as "Pipelines" in the rest of this document.
To accomplish this task, we'll be using ECS Deploy Runner to deploy Pipelines, then using Pipelines to destroy ECS Deploy Runner.
What's New
ECS Deploy Runner was designed as a highly secure approach to CI/CD for infrastructure. With Pipelines, we adapted the security principles built into ECS Deploy Runner to embrace modern CI system functionality, leaning heavily on GitHub Actions native functionality to create a more streamlined setup experience, and better overall UX. The major changes in Pipelines include:
- Easier setup. There are no resources to deploy in AWS (other than granting an OIDC token), and setting up Pipelines amounts to configuring a few GitHub Actions workflows.
- Pull-request centric UX. Pipelines organizes the user experience around the pull request, adding rich indicationg of everything that occurred directly in the pull request comments.
- Streamlined updates. Pipelines has been designed to make getting the latest version published by Gruntwork an easy experience.
Prerequisites
- Ability to create repositories in your GitHub Organization
- Ability to add users to your GitHub Organization and the Gruntwork Developer Portal
- Permissions to create secrets in GitHub repositories
- Terragrunt installed on your system
Create your infrastructure-pipelines repository
Pipelines separates code (IaC) and deployment using two different GitHub repositories. One repository holds both the deployment code and the AWS account access, and assigns write privileges only to a select group of admins. This repository uses OpenID Connect and AWS IAM roles to generate temporary session credentials, avoiding the need to store long-lasting secrets.
We strongly recommend naming this repository infrastructure-pipelines. All code generated assumes the repository will be located at <your GitHub Organization>/infrastructure-pipelines, so using a different name will require manual work on your behalf.
Initialize infrastructure-pipelines repository
Create a new Pipelines repository from the template below:
- Click
Use this template - Click
Create a new repository - Select your preferred organization from the owner dropdown
- Name the repo anything you like and make note of the name.
- Select the
Privateradio button - Click
Create Repository
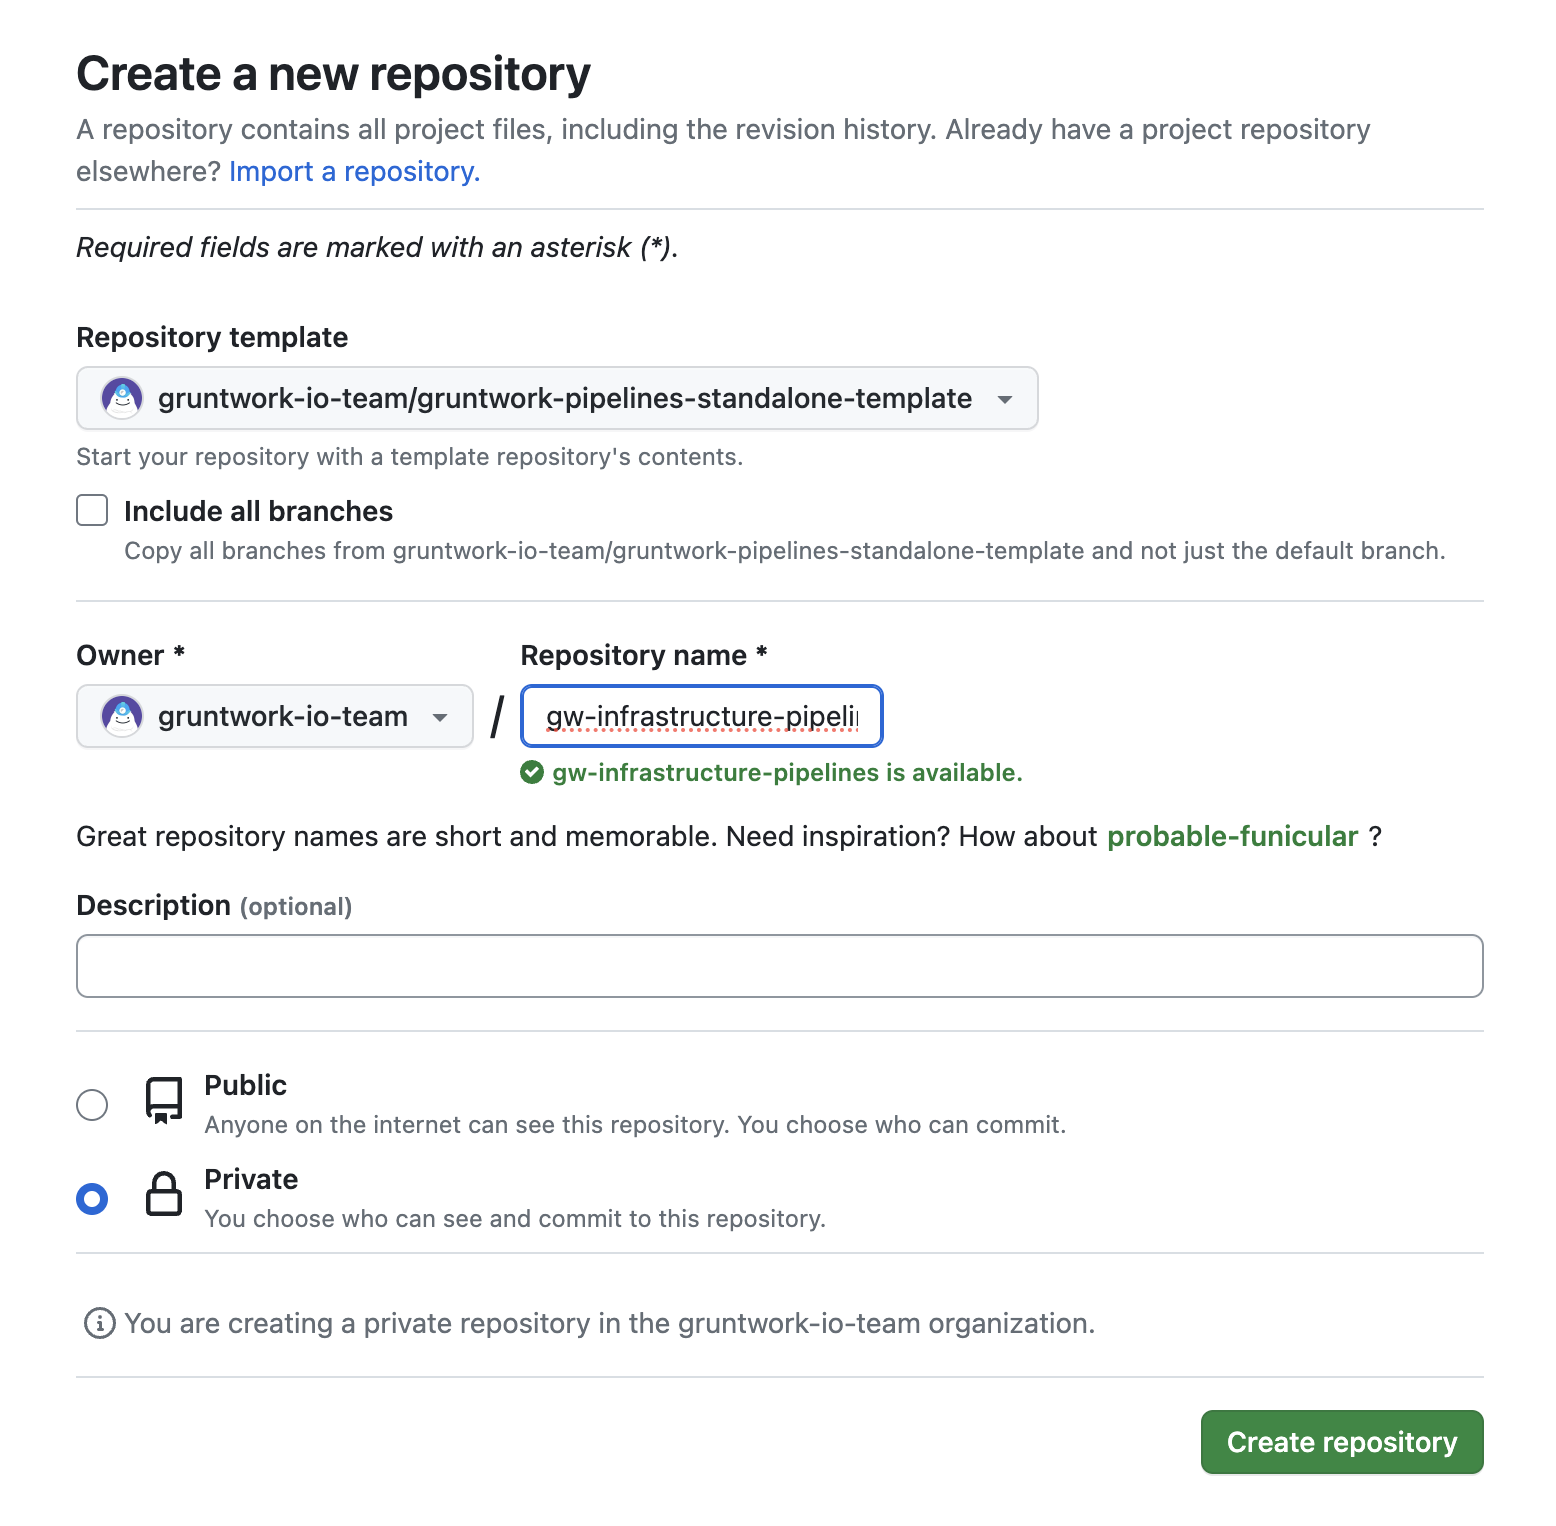 GitHub form for creating a new repository
For a simple proof of concept, the default repo configuration will suffice. Before using this repository in a production environment, we recommend setting up a branch protection rule for your main branch. At a minimum, we recommend enabling requiring a pull request before merging with at least one reviewer required.
Create Temporary Bootstrap Token
Create a temporary PAT with your own GitHub account so it has the ability to open PRs In your infrastructure-pipelines repository by using a classic PAT with repo and workflow access. Once you've generated this token, create a secret called CUSTOMER_BOOTSTRAP_ACCESS_TOKEN in infrastructure-pipelines and place this value in it.
Bootstrap the Pipelines Repo
In the newly created repository, go to Actions and run the Infrastructure Pipelines Bootstrap and enter in the name of your infrastructure-live repository. This will open up a pull request that you can merge.
Delete Temporary Bootstrap Token
Once the Pipelines repository is bootstrapped successfully, you can delete the CUSTOMER_BOOTSTRAP_ACCESS_TOKEN.
GitHub CI Machine Users and Secrets Setup
Pipelines utilizes two machine users, one for read-only and another elevated operations. Follow this guide to create them and and set up the correct access tokens in each of the repositories.
Create AWS IAM roles for Pipelines
In Pipelines, each of your accounts must have an AWS IAM role. This role shares the same permissions as the one used in ECS Deploy Runner, except for the new role's trust policy, which enables GitHub Actions Workflows running in your infrastructure-pipelines to assume the role using OIDC. This capability allows workflows to create and utilize short-lived session tokens whenever they run, in contrast to relying on long-lived credentials stored as secrets.
For more information see security hardening with OpenID Connect and OpenID Connect in AWS.
Generate the Pipelines IAM code using GitHub Actions for each account
In infrastructure-live, open a pull request and copy this GitHub Actions workflow file into your .github/workflows directory.
Once that has been merged into main, run the Infrastructure Live Bootstrap for each account to generate the Terraform needed to create the IAM Roles and the GitHub OIDC connection to securely do deploys. Each workflow run will open a PR that needs to be merged.
We recommend trying out Pipelines in non-production environments first, before rolling out to production environments.
The ECS Deploy Runner will detect the change and run a plan to create the IAM Roles, OpenID Connect providers, and all requires IAM policies. Review the plan output and confirm it looks as expected.
Once you have reviewed the plan output and gotten any necessary approvals, merge the PR. The EDR version of Pipelines will run apply to create the resources.
Updating your accounts file
As part of a separate product improvement initiative, we have transitioned from the accounts.json file to accounts.yml. This change not only enhances readability but is also functionally better, with Terraform's built-in YAML formatter better meeting our requirement for regenerating a formatted file to facilitate the addition of new accounts through GitOps workflows. It's important to note that there is no functional distinction between these two file types in either the EDR version of Pipelines or Pipelines.
Upgrade from accounts.json to accounts.yml
The data required in accounts.yml is the same that is required in accounts.json. You can quickly convert your accounts.json to accounts.yml by using the yq CLI tool and the following command.
cat accounts.json | yq -P > accounts.yml
Confirm the data matches between your accounts.json and accounts.yml. If you are upgrading all of your deployments at once, you may delete your accounts.json file. If you will use both ECS Deploy Runner and Pipelines at the same time, do not delete accounts.json.
Add new workflows in your infrastructure-live repository
Similar to ECS Deploy Runner, Pipelines employs GitHub Actions as the computing layer to execute actions on your infrastructure. However, Pipelines uses a different workflow with a smaller number of steps and the Pipelines binary responsible for orchestrating changes. To simplify the upgrade process, we've created a template that can be used to generate the workflow with a small number of parameters. In both workflows, the workflow file named pipelines.yml is utilized, so generating the new workflow will overwrite the old.
If you plan to use ECS Deploy Runner and Pipelines at the same time, to migrate from one to the other, you will need to rename your existing pipelines.yml to another name before generating the new pipelines.yml for Pipelines.
You will also need to ignore changes to files in account based directories that you have and have not migrated yet using paths-ignore in the appropriate workflow file. For example, if you have migrated your development account to Pipelines, you would add development/ to paths-ignore in the ECS Deploy Runner workflow yaml, then add development to paths in the Pipelines workflow yaml.
See the GitHub docs on including and excluding paths to learn more.
To generate the new pipelines.yml file, run the following command, replacing the values in <> with appropriate values for your organization -
boilerplate --template-url "git@github.com:gruntwork-io/terraform-aws-architecture-catalog.git//templates/infra-live-github-base" \
    --output-folder ./infrastructure-live/.github \
    --var InfraPipelinesRepoName="<your infra pipelines repo name>" \
    --var GithubOrg="<your GitHub org name>" \
    --var AwsAccountName="<your AWS Account Name>"  \
    --non-interactive
Next, create a branch, commit your changes, and push your branch to the remote repository. Then create a pull request targeting your default branch (e.g., main). Gather any required approvals then
Remove old ECS Deploy Runner infrastructure
After you have confirmed Pipelines is running in your account(s), you can destroy the infrastructure that the ECS Deploy Runner used. With Pipelines now fully functional, you can initiate the infrastructure destruction process by submitting a pull request (PR) for each of the directories containing the EDR configuration. Subsequently, you can submit a final PR to remove any remaining EDR configuration within your _envcommon directory.
Delete code for old pipelines
For each environment in which you have deployed the ECS deploy runner, remove the ecs-deploy-runner directory. This can be found in the file path <account name>/<region name>/mgmt.
We recommend migrating to Pipelines in non-production accounts first, then migrating production accounts after a few weeks of trying out Pipelines. This allows time for you to familiarize yourself with Pipelines and reduces the likelihood of disruption to your workflows and day-to-day operations.
Create a branch, commit your changes, and push your branch to the remote repository. Then create a pull request targeting your default branch (e.g., main). Pipelines will detect the change and run a plan -destroy to remove the ECS deploy runner infrastructure. Gather any required approvals then merge the PR. On PR merge, Pipelines will run a destroy to remove all of the infrastructure.
Wrapping up
Congratulations! If you have followed this guide, you will be deploying infrastructure to at least one AWS account using Pipelines. If you have feedback, please reach out to feedback@gruntwork.io.